Assigning a Mega Menu
Overview
The layout does not appear until it is attached to a trigger. On Divi 5, pick the WordPress menu and item. The custom identifier CSS class method still works for Divi 4 and for tooltip-style triggers.
Use pages with the Default Template unless you have a Theme Builder template that already includes the header.
Divi 5: assign from the mega menu
- Edit the mega menu.
- In the sidebar, choose WordPress menu.
- Choose Menu item.
- Update the mega menu.
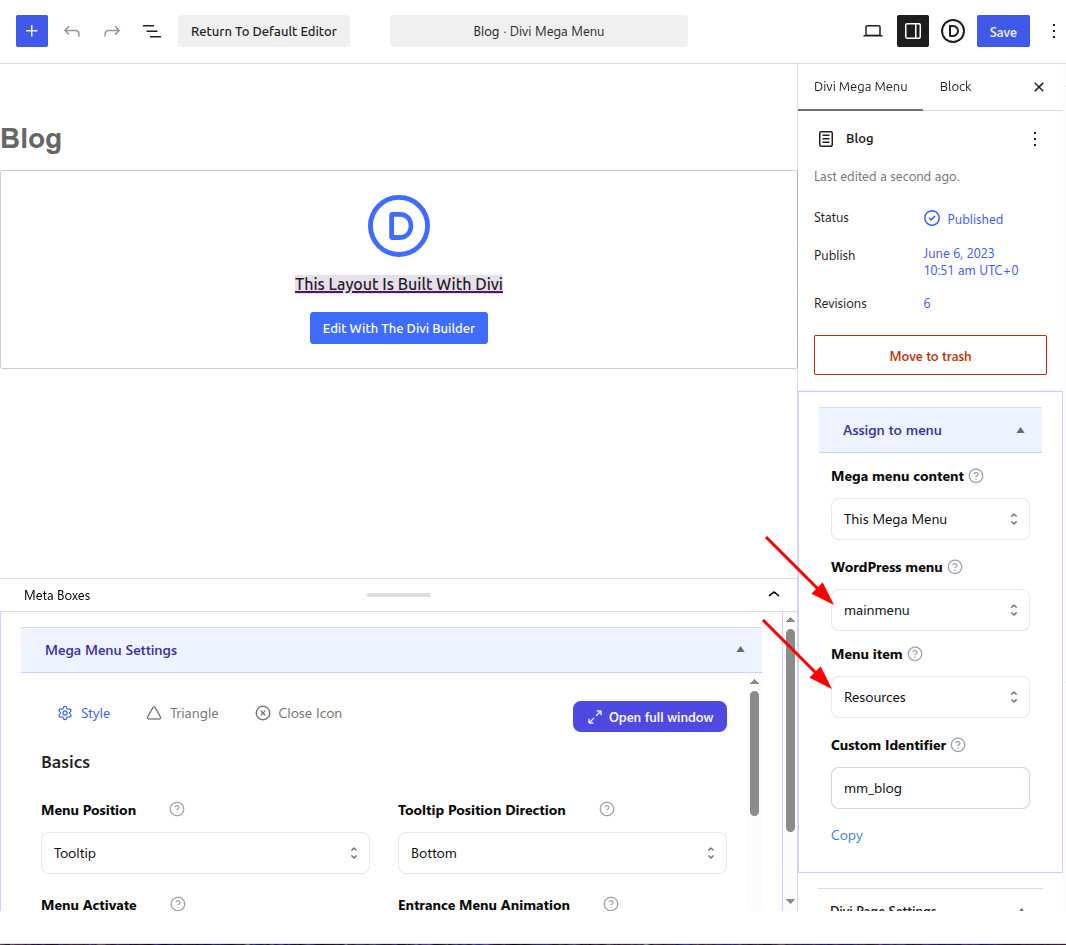 Mega Menu writes the identifier onto that item. You can change the assignment later from the same screen.
Divi 5: assign from Appearance → Menus
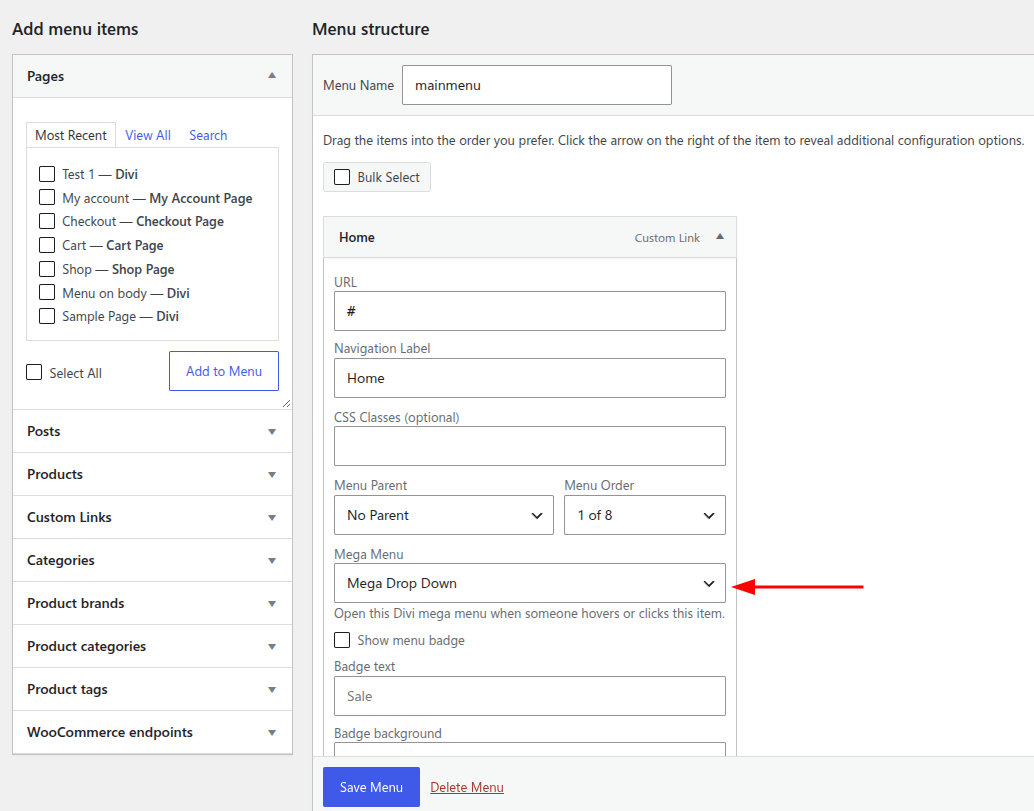
- Go to Appearance > Menus.
- Expand the parent item that should open the panel.
- In Mega Menu, choose the mega menu (or None — normal menu link to clear it).
- Optionally enable Show menu badge and set badge text and colors. Full badge styling is on the mega menu Style tab.
- Save the menu.
Navigational header
In Divi Engine > Mega Menu Settings, open General and confirm Navigational Header matches how your header is built. Keep Default Divi when you use the theme header or when a Theme Builder global header is already applied. See Settings.
Divi 4 and CSS class assignment
This method still works on Divi 5 if you prefer it, and it is the usual Divi 4 workflow.
- Copy the mega menu Custom Identifier.
- Go to Appearance > Menus.
- Enable CSS Classes under Screen Options.
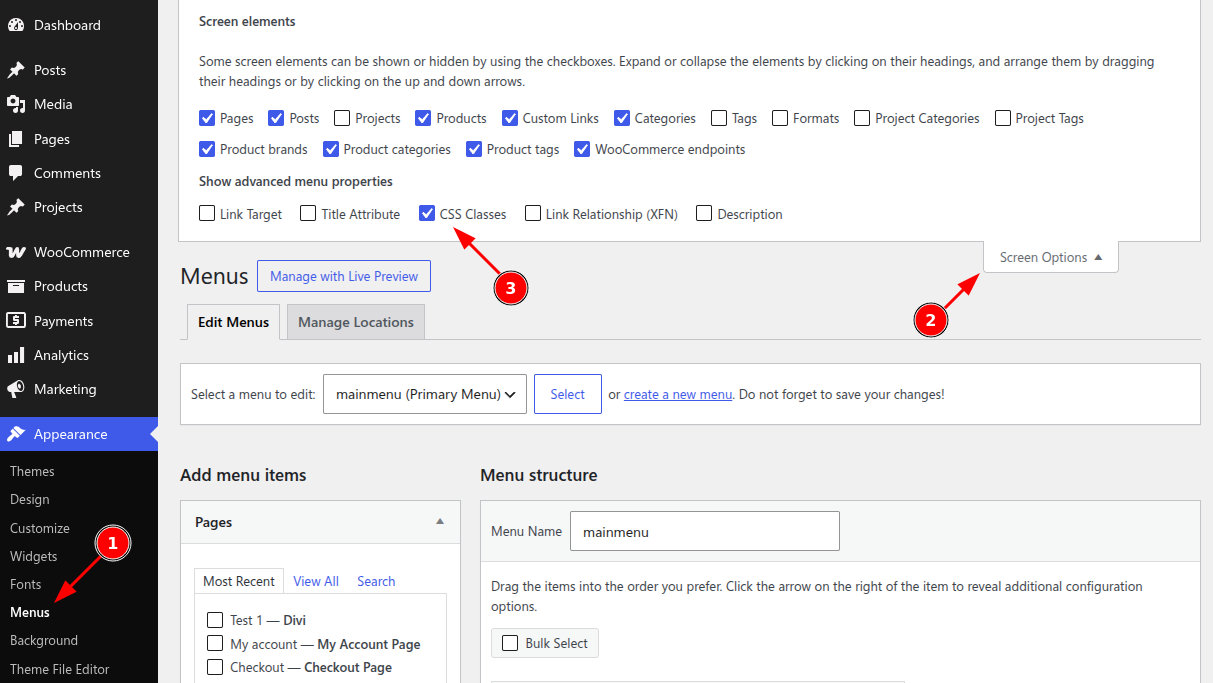
- On the parent item, paste the identifier into CSS Classes.
- Save the menu.
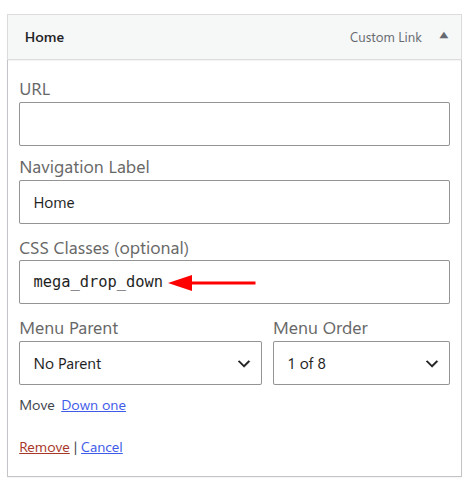
The identifier must match exactly (letters, numbers, underscores; no spaces).
Tooltip trigger (CSS class on a module)
You can open a mega menu from a Divi module (for example a button) instead of a WordPress menu item:
- Set Menu Position to Tooltip on the mega menu (see Style a Mega Menu).
- On the trigger module, open Advanced and add the custom identifier as a CSS Class.
Mega Tabs and Mega Drop-down are supported on mega menus assigned to a WordPress menu item, not on tooltip-only triggers.