How To Create An Image Or Icon With The ACF Checkbox
Introduction
Follow this example on how to create an image or icon with the ACF checkbox.
Preview

Step 1: Add the ACF Checkbox
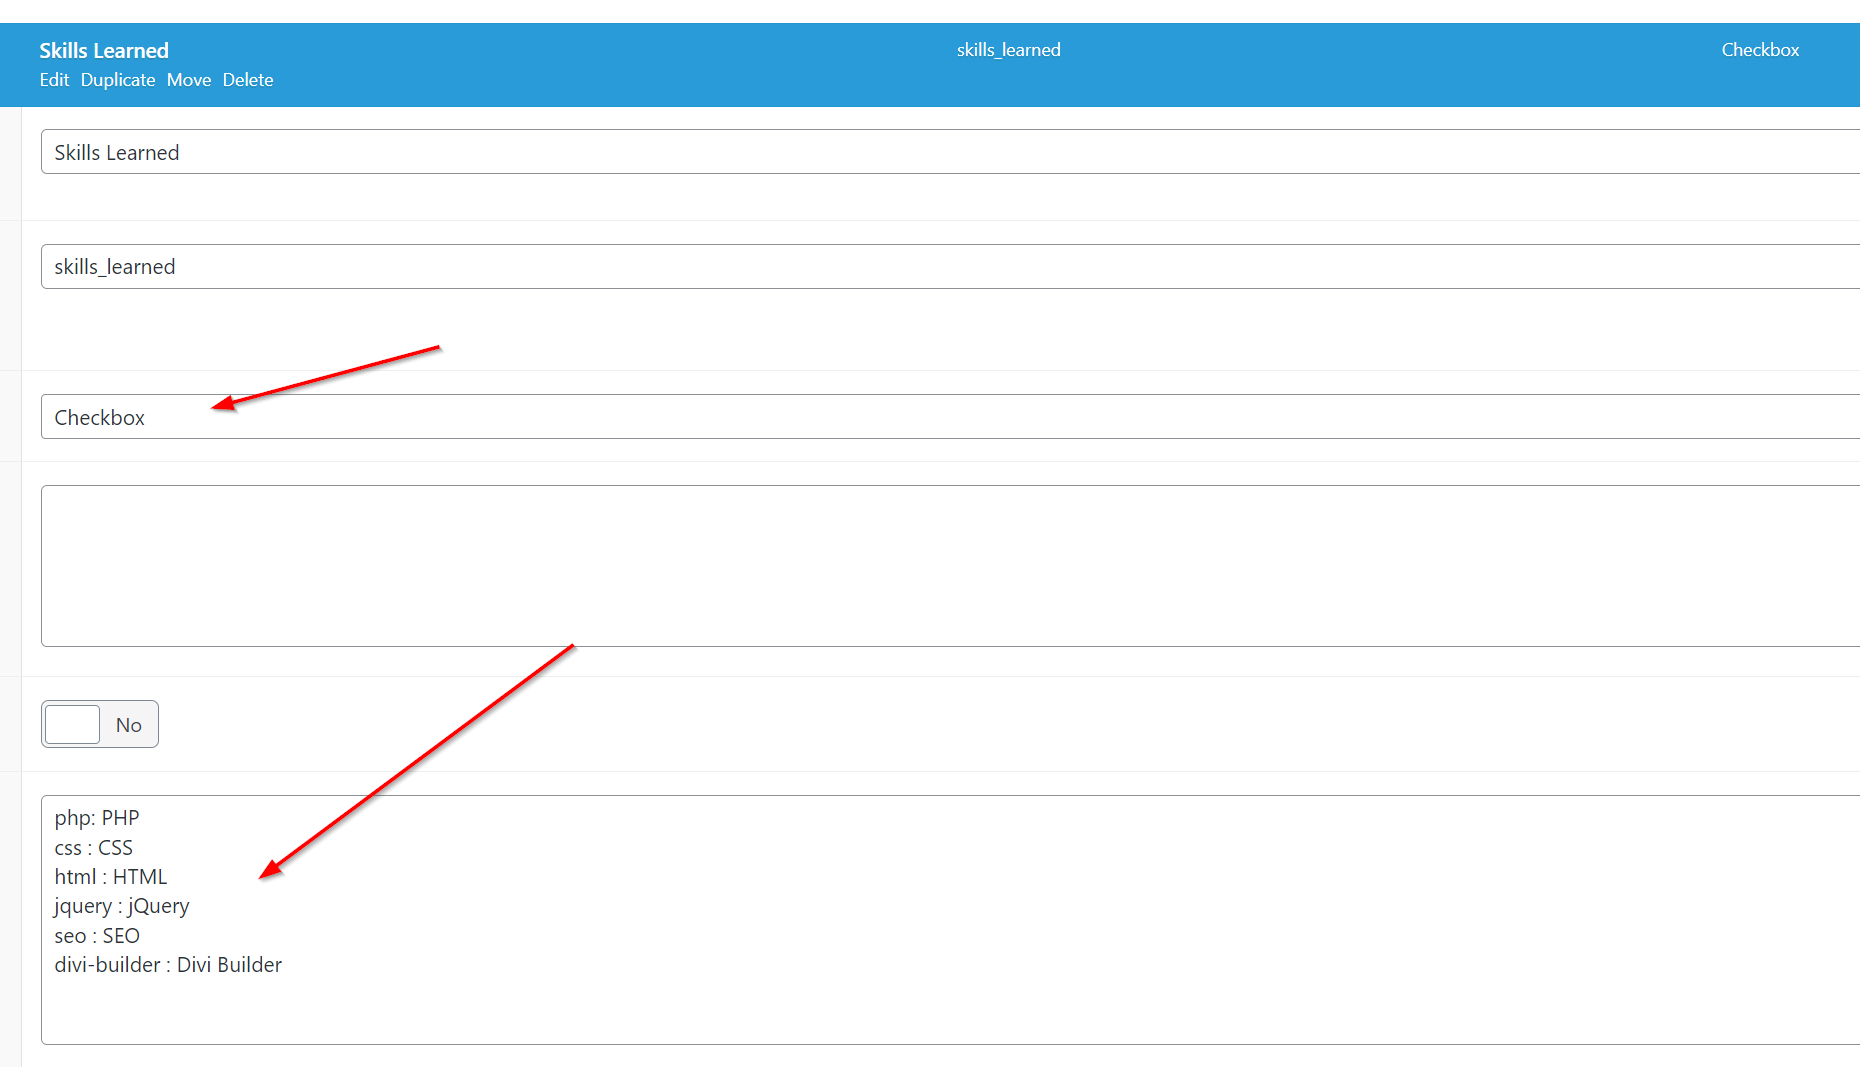
Add a new ACF field that can be a Checkbox. Add the values like the below image
Step 2: Assign a value/s to the post
Check the boxes that you want to appear on the post - see below for our example

Step 3: Add ACF Item Module
- Add an ACF Item module to the Theme Builder Template or Divi Library Layout
- Main Options > ACF Name: Choose the ACF field you made above in the setting
- Specific Settings > Checkbox: Style: Choose "Bullet List"
This will output the list below

What you will notice if you inspect the page, is that we add a class name for each value - see below

Step 4: Use CSS Magic
The final step is to add some CSS magic to add the icons or images before the titles.
Add Icons
Use the CSS below to create some icons. As you can see, we used Font Awesome and Divi libraries to create the icons.
.skills-used li {
padding-left: 52px; /* Add space to the left to make space for the icon */
position: relative; /* Make relative so we can line up the icon with absolute position */
}
.skills-used li::before {
position: absolute;
color: #1d0d6f; /* Change the color of the icon */
font-family: FontAwesome!important; /* Use fontawesome font-family (comes with Divi) */
font-weight: 400!important;
font-size: 24px;
margin-right: 10px;
top: 50%;
transform: translateY(-50%);
left: 15px;
}
.skills-used li.php::before {
content: "\f457"!important; /* icon code for PHP icon */
}
.skills-used li.jquery::before {
content: "\f3b8"!important; /* icon code for jQuery icon */
}
.skills-used li.divi-builder::before {
font-family: ETmodules!important; /* Chaneg the font-family for this one, as we want to use the Divi Icons */
content: "\E625"!important; /* icon code for Divi Icon icon */
font-size: 30px;
}
After this CSS, it will look like this
 Make it better with some more CSS - we added display:inline and some other CSS to make it look like buttons
.skills-used li {
display: inline-block;
padding: 10px 20px;
border-radius: 50px;
margin-right: 10px;
color: #1d0d6f;
font-weight: bold;
}
.skills-used li::before {
color: #fff;
}
Now it will look like this
Add an image
You can do the same with an image but it would need more CSS - below is some guidance - add this instead of the font family for the ::before element.
background-image:url("add_url_here");