Quick Start
This quick start adds the form in the Divi 5 Visual Builder, from the Divi Membership folder. Divi 4 uses the same plans and the Register module in the Classic Builder. See Register module on Divi 4.
Goal
By the end of this guide you’ll have a simple membership: one plan, a signup form, and member-only content. Visitors can sign up, and once logged in they’ll see the content you’ve locked for members.
What you need
- Divi Membership installed and your license entered (see Installation).
- A page you can edit in the Divi 5 Visual Builder (for example “Sign up” or “Pricing”).
Steps
Step 1: Create a membership plan
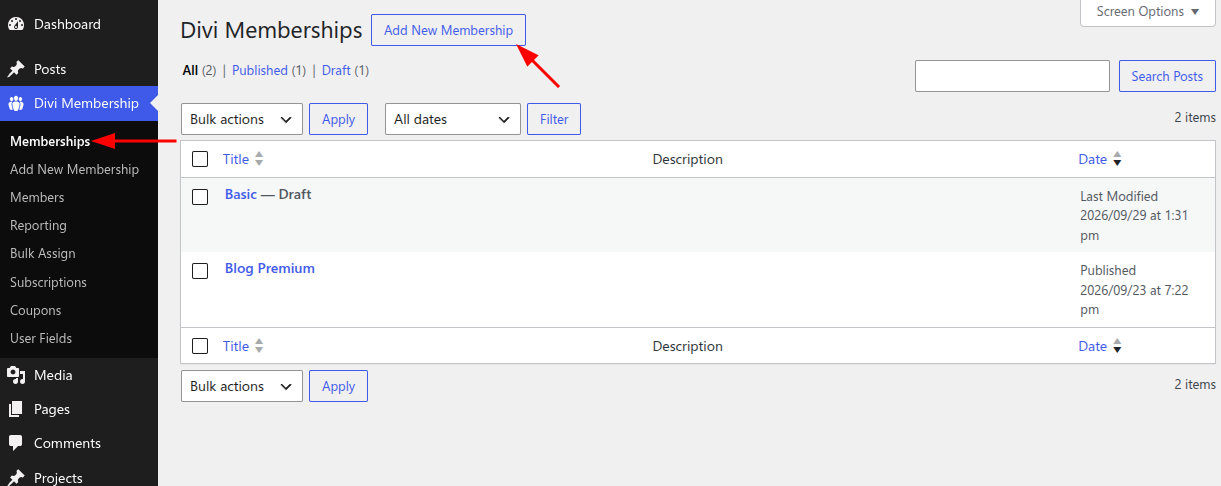
- Go to Divi Membership → Memberships.
- Click Add New Membership.
- The editor opens in a full window. Enter a Membership name, such as Basic or Pro.
Close full window returns to the compact editor. Save membership stays in the full window.
Step 2: Add a price
- Open the Billing tab.
- Click Add billing cycle.
- Set Title to Monthly, Type to Recurring, Billing period to Every 1 month, and enter the Price.
- You can add Sale price (optional), or another cycle such as Yearly.
- Click Save membership.
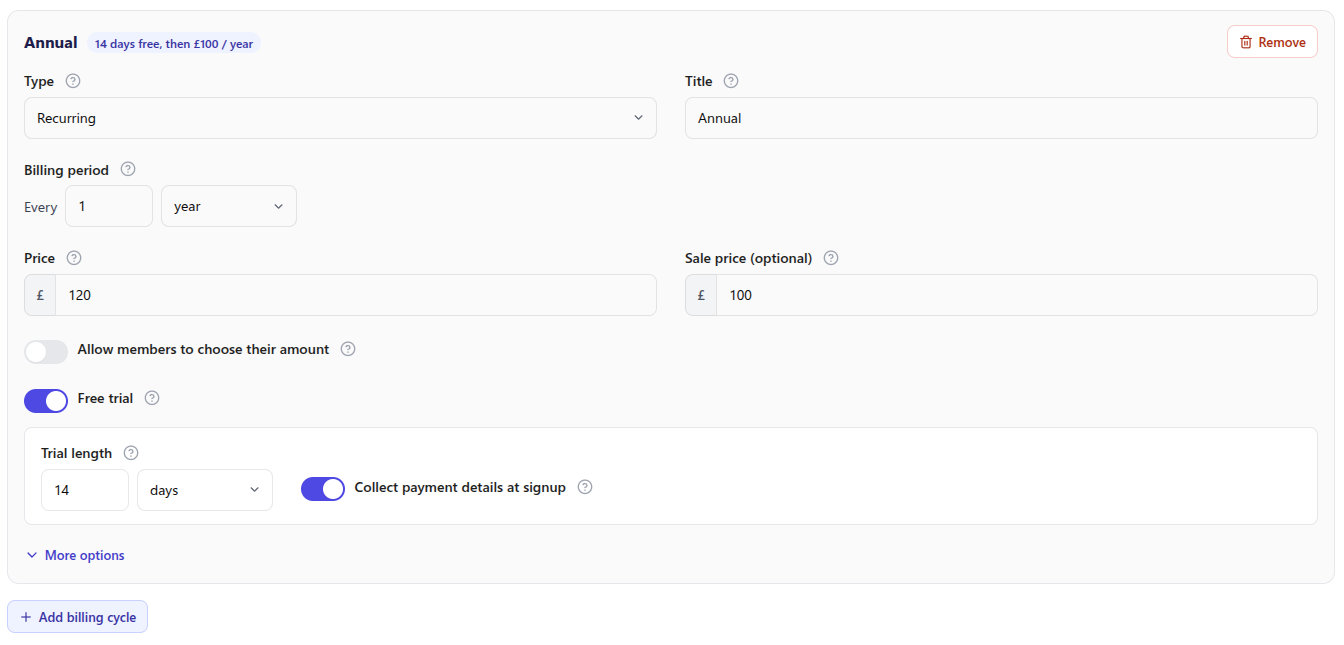
Quick reference: Title is the label members see, such as Monthly. Type is Recurring, One-time, or Free. Billing period is Every plus a count and a unit (day, week, month, or year). Price is the amount charged, and Sale price (optional) replaces it when set. On a recurring cycle, turn on Free trial, set Trial length, and use Collect payment details at signup when a card is required during the trial. A one-time cycle uses Access length instead of a billing period. Leave access length empty for lifetime access.
Step 3: Turn on member-only content
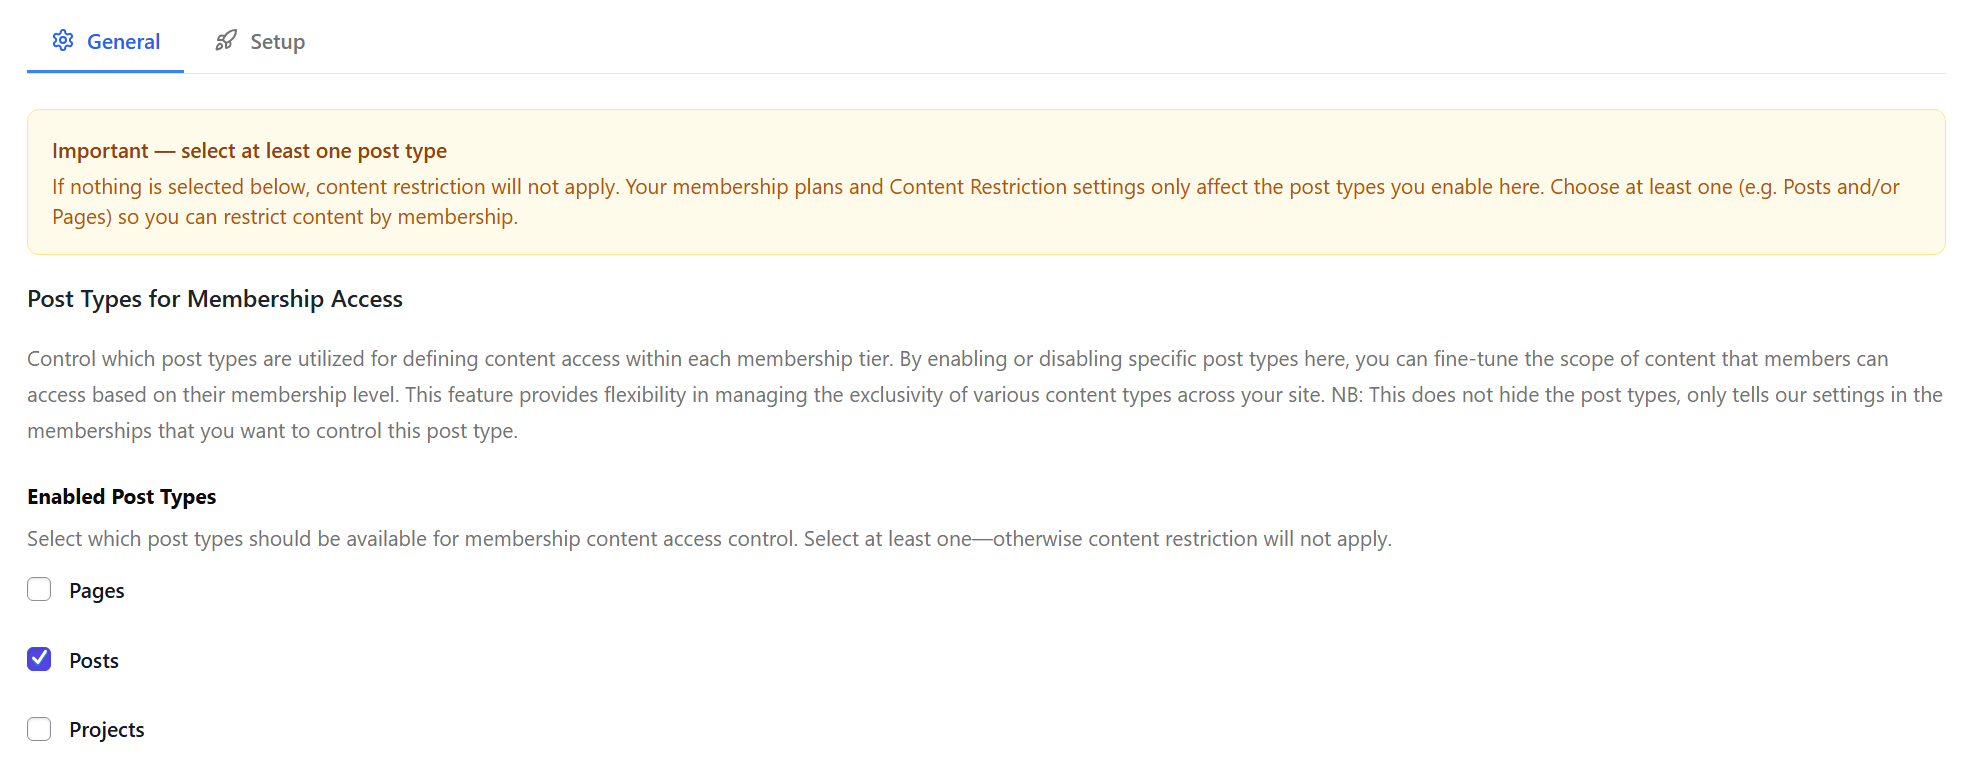
- Go to Divi Engine → Divi Membership → General.
- Under Enabled Post Types, turn on the kinds of content you want to protect (e.g. Posts). Only members will be able to see these.
- Save settings.
Step 4: Choose what this plan can access
- On the same plan, open the Access tab.
- The first Content rule starts with Title set to All for the post types you enabled, so members can see that content until you narrow the rules.
- Set Type to a post type or taxonomy, then choose specific items under Title. Use Add content rule when the plan needs another rule.
- Click Save membership.
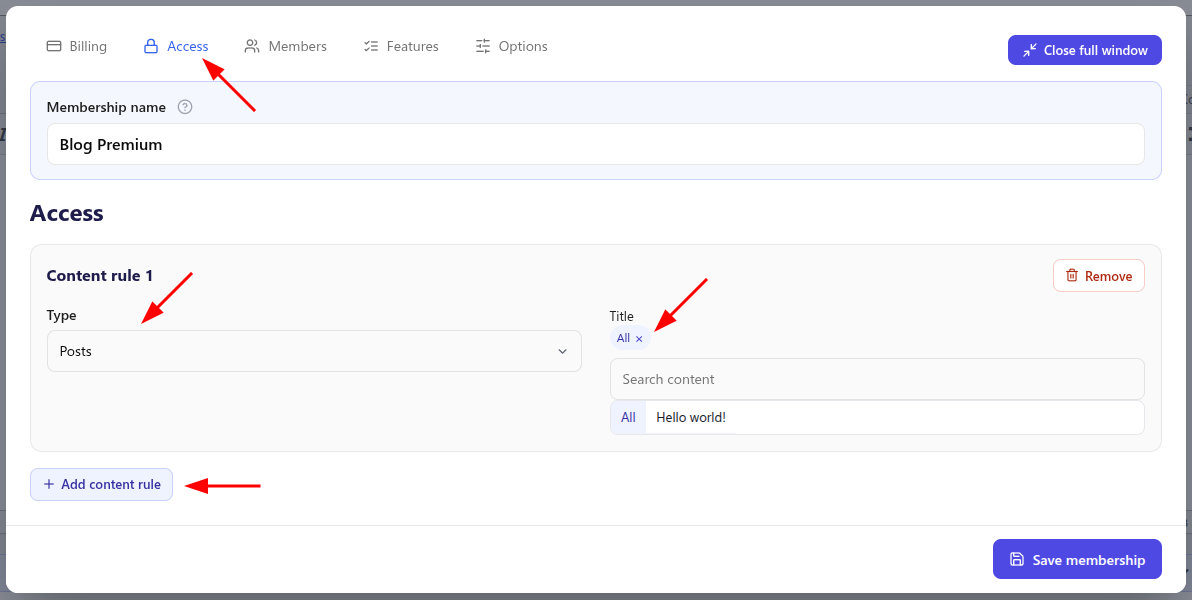
Everyone who does not have this plan is blocked from that content. Each billing cycle header shows a short summary, such as “14 days free, then £29 / month”.
Step 5: Set up payments (Stripe or PayPal)
If your plan isn’t free, set up how you’ll take payment.
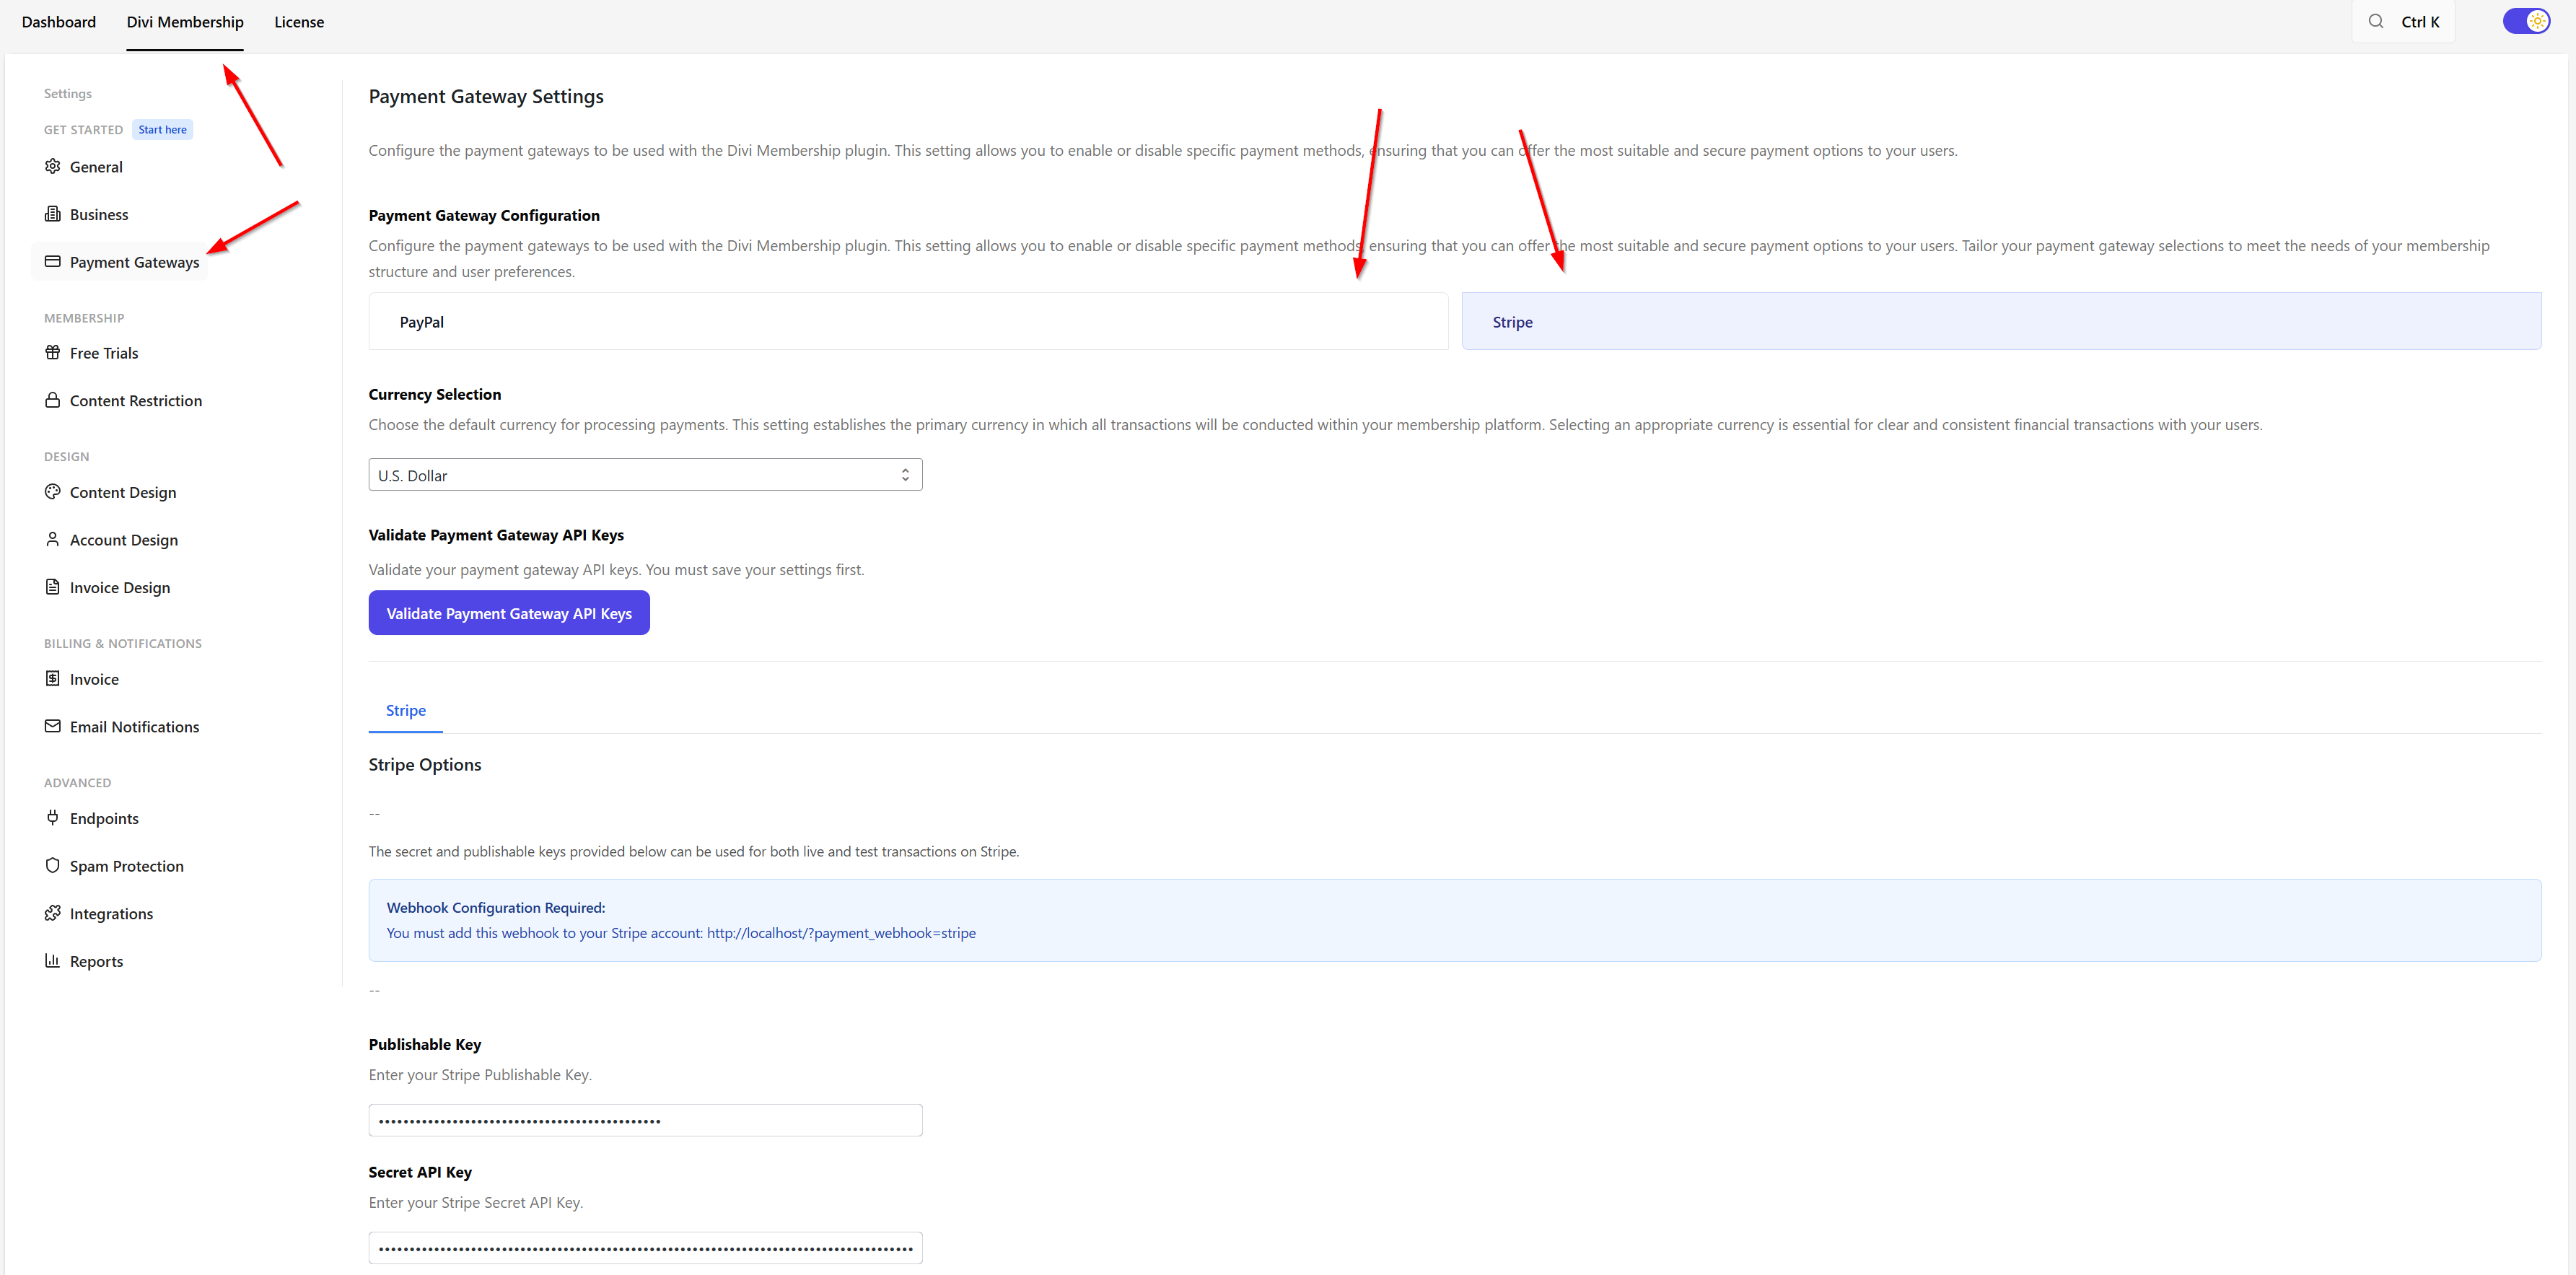
- Go to Divi Engine → Divi Membership → Payment Gateways.
- Turn on Stripe or PayPal (or both).
- Enter the keys from your Stripe or PayPal account. The plugin will tell you which ones to paste where.
- Save settings.
If you’re only offering a free plan or a trial with no card required yet, you can skip this and set up payments later.
Step 6: Add the registration form to a page
- Edit or create a page in the Visual Builder (for example “Sign up” or “Pricing”).
- Add Registration Form from the Divi Membership folder.
- Turn on Enable Payment Form? and leave Membership Plan Field Style as Select, or switch it to Radio.
- Set Redirect Type to the member account page or a thank-you page.
- Save and publish.
On Divi 4, add Register from the Divi Membership group in the Classic Builder. See Register module on Divi 4.
Step 7: Test it
- Open your signup page in a private/incognito window (or while logged out).
- Sign up and pay (if the plan has a price).
- Check that you’re sent to the page you set and can open the member account.
- Open a post that’s for members only: you should see it when logged in, and a “members only” or login message when logged out.
Checklist
- Visitors can reach your signup page and complete signup.
- After login, members can see the member-only content you set.
- Divi Engine → Divi Membership and its settings work in the admin.
If something doesn’t work, double-check Payment Gateways (keys correct?), Endpoints (member account URL), and that the Registration Form has the payment form on and a redirect set.
What's Next
- Feature Overview — Plans, payments, trials, coupons, account, and reports.
- Registration Form — Order summary, coupons, and payment layout.
- Settings — Which content is member-only, and where each setting lives.